By Michael Deneen
Astronomy Chart Light – Gloucester Field Lamp: A few years ago, I started searching for a dimmable, battery-operated red-LED field lamp for my chart table, and I was surprised to find none on the market. I decided to build one on my own, and it has changed the way I observe.
No more holding a red flashlight in my mouth, no more wearing a miner’s lamp and turning on the white light by mistake; just a constantly available, dimmable red glow when I want to read a chart or pick out an eyepiece. Because it’s dimmable, it actually helps preserve your dark adaptation better than the miner’s lamp.
It was easy to make, and it has been very popular. Everybody who sees it wants one, and I wound up making lamps for all my
observing buddies in the Gloucester Area Astronomy Club in Gloucester, Massachusetts.
You can’t buy it anywhere; you’ll have to make your own if you want one. It will run for a very long time – months of observing sessions – on a single 9-volt battery or, even longer, on eight AAs. You can build one in about two hours. The principles are the same for a clamp-on articulated arm desk lamp, but for these purposes we’ll stick to a regular fluorescent desktop lamp.
How It’s Done
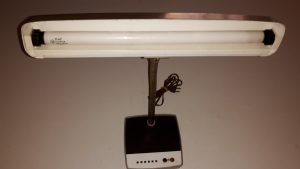
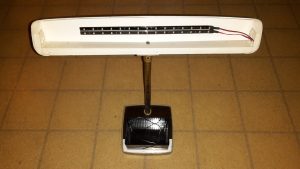
I ordered an old fluorescent desk lamp from eBay and stripped out everything that had to do with fluorescent light – the bulbs, switch and sockets – leaving in the wiring that runs up the gooseneck and, for weight and stability, leaving the ballast in the base
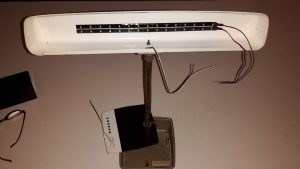
as well. Don’t worry if you damage the wiring in the gooseneck taking the base apart; you can run new wires up to the lampshade very easily.
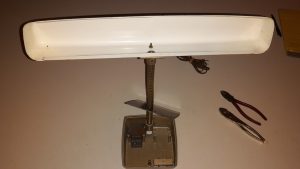
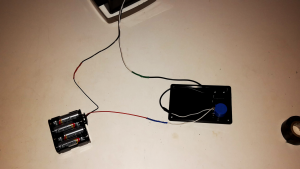
I ordered some adhesive-backed red-LED strips from Amazon – the kind intended for tricking out cars and motorcycles – and stuck two of the strips on the underside of the lampshade. I soldered these to the existing wires running up the gooseneck. I bought a small hobby box to hold the batteries and switches, a single-throw on-off switch and a 2-ohm potentiometer for dimming, and a package of 9-volt battery connectors and an eight-AA battery holder.
I drilled holes in the box lid for the switch and dimmer, and another in the bottom for the wiring coming down the gooseneck and up and out through the top of the base. Then I mounted everything in the hobby box and taped that to the top of the lamp base
using 3M VHB (Very High Bonding) double-sided tape.
The wiring is uncomplicated; if you can solder you can do this easily. Remember that the polarity on the LEDs is important; the black wire is always negative. The switch, dimmer and batteries are contained in the hobby box. I first soldered one lead from a 9-volt battery pigtail to one of the wires running up the gooseneck, and then connected the other battery pigtail wire to the center terminal on the potentiometer. Next, I connected one of the other terminals on the potentiometer (one will cause the knob to dim clockwise, the other counter-clockwise) to the single-throw switch, and drilled two holes to mount these in the lid of the hobby box.
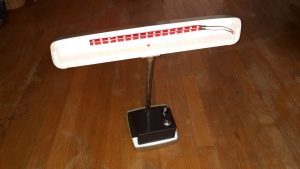
I connected the remaining wire from the on-off switch to the other wire running up the gooseneck to the LEDs, and that’s all there is to it – a truly usable, sturdy, long-lasting battery-operated red-LED astronomy field lamp. The batteries power the LEDs
plenty bright enough for astronomy purposes (you’ll use the dimmer), and the LEDs draw very little current. Whether you run it on a single 9-volt battery or eight AA batteries for 12 volts, the batteries will last for many observing sessions.
You’ll wonder how you ever got by without it!
Parts list (everything but the used lamp is available from Amazon):
– One old fluorescent desk lamp, from Ebay. Don’t spend more than $25.00.
– About a foot of 3M VHB tape.
– Package of self-adhesive red LED strips, or Spool of red LED strip and connectors.
– 2.2-ohm potentiometer.
– Single-throw on/off switch.
– Hobby box (4.7 x 2.2 x 2.2).
– AA battery holder with built-in 9v connector.
– Package of 9-volt battery connector pigtails.
– Eight AA batteries or one 9-volt battery.
– A few feet of spare wire for connecting the dimmer and on/.off switch
 Michael Deneen has enjoyed astronomy for more than 25 years. He holds a Ph.D. in Literature from the Johns Hopkins University and currently teaches writing and humanities at Endicott College in Beverly MA. He cofounded the Gloucester Area Astronomy club in 2003 on Cape Ann, MA, and serves as president of the North Shore Amateur Astronomy Club in Boxford MA. More than anything else he enjoys being out under the stars with friends, hunting down objects that are just barely there.